Monday 28 February 2011

Tim's stamps


I got my alcohol inks TSV from QVC, so had a play at making some backgrounds - the above is on normal photo paper (glossy) and I stamped it around with the tool....need to work harder at this technique as TH made it look easy and covered whole pieces....whereas I don't seem to manage that yet :)

However the technique of putting some of the colours and mixer down on a craft mat and swishing your photo paper through it worked a lot better for me, as you can see below.  I also love the acrylic stamps that came in the kit and this is what I created whilst playing with them :)

Sunday 27 February 2011

Twisted rose tutorial

Here is my promised tutorial to make the paper rose ribbon you saw on my splash LO

 Things you need...tho I forgot to add some glitter glue to the picture.  Cut several  1" by 12" strips of your chosen paper.  A 12" strip does about 2 roses, so you can work out how many you need.  Also cut a slightly thicker 1.25" strip to stick the roses on.

 Start by folding your paper into thirds, so fold the top down to the middle and then the bottom edge up, this means that you get a nice edge to the roses and it makes it a solid colour
 If you are using cardstock as I am in this example then spritz it with a little bit of water - not too much (tho you can let it dry it you do over spritz) just enough to make it a little more malleable.  If you are using paper, then you should be fine without.
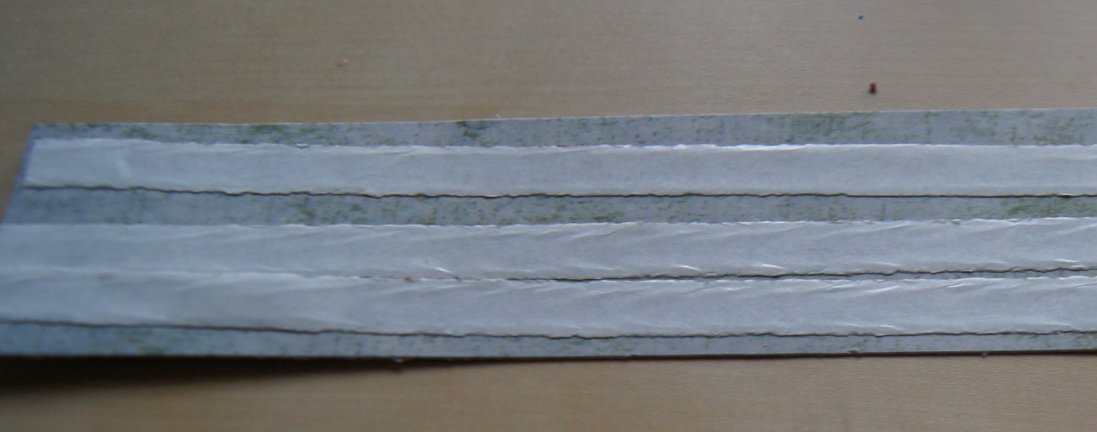
 pop some double sided tape on your backing piece - just do 2 strips - not 3 as in the picture!!
 start twising your pieces of paper until you get some nice curls
 do this to all your bits of paper

 Start by placing the end of one of your strips on the backing paper and then curl the paper around to get the rose shape
 Once you have done one rose, you can then loop the paper down to start on the next.
 any paper you have left over you can snip off the end and then use it again later to fill in other bits of roses...keep going and adding more paper until you have filled your strip
 I then added some glitter glue - mainly to hide the double sided tape that you could see, tho you could always cut the strip down more so just the roses show.
 here are some close ups of the roses and glitter dolloping over the side - if only they were fairy cakes :)
Please let me know if you have a go at this as I would love to see it in action.

Monday 21 February 2011

Butterfly card


Here is a card I made for my MIL, the sad news is that she had a nasty fall and needed a partial hip replacement, so your prayers for a speedy recovery would be appreciated.  This is for her, and my kids wrote the inside so hopefully it will make her smile.  I used some quite old cosmo cricket papers, but I still love them, and my martha stewart butterfly (a highly used punch in my craft room) :)

Saturday 19 February 2011

Splash


 I decided to have a go at a more monochrome, less busy LO...so this is whites and blues.  I had a go at splashing some watered down distress ink in the corner with  a brush.  I fake stitched around the papers (I should get me sewing machine out!!) - you make holes with a needle and then join them up with a white gel pen, and it looks fairly realistic, take a look at the close up.  I also made a paper version of that really nice rose ribbon, I haven't managed to get my hands on any yet, so I twisted and crumpled the paper and thought it gave a wavey 3d effect to the photo, I will work out a little tutorial on this and load it up.  This is another holiday shot with the underwater camera, which I can't recommend highly enough as we got some great pictures of the kids.  Thanks for popping by, and here are the close ups.


Wednesday 16 February 2011

valentine


Here is my valentines card that I made for DH....I was put to shame as he bought me chocs and jewellry....so I made chicken pie and this card (which he thought was a little cheesy!!! I have also promised to make him a UTEE frame too).  I used my Tim Holtz swirl mask, and one of those spritzers which has gold perfect pearls and red distress ink in.  The stamps are creative expressions and I embossed the key, lots of tearing and grungeyness and voila.  There are a couple of close ups below...one of them to show the glimmer - it never comes out that well in photos.  Sooooo next year I will try to be more prepared :)

Saturday 12 February 2011

Pop Up


I decided to have a go at A Trip Down Memory Lanes sketch challenge...and ended up using the same colours as my last LO, but these papers are from pebbles and called tree house.  Here are the flowers I made in situ - using a string vine and some paper leaves that came in the kit.  I damped some cardboard down to strip away the top layer and reveal the corrugated part, and then painted it in white acrylic...I also edged the photos with white acrylic.  This is a photo of our new pop up tent we bought to go on holiday to France - Quecha 4.2 (for those that might be interested :)).  It goes up in minutes and isn't too hard to get back in the bag, perfect for overnight stays - we also bought an extension for it too whilst in France (don't laugh :) it is great!).  Here are some close ups of some of the elements.


Thursday 10 February 2011

More flowers and a couple of butterflies


Having seen some of the beautiful flowers from CHA I decided to have a go at making some more the chiffon I found in poundland a while back.  I chose the colours to go with my LO, cut the chiffon into different size circles (you don't have to be too precise) then melted the edge, layered it up - there are 2 layers of each colour of chiffon - so 6 in all, and stitched a button through the middle.  More detailed instructions are here. I am then going to back them on some paper flowers....whilst there I also had a go at some 3d butterflies, a tip from my MIL where you punch out 3 and fold 2 of them in half and then stick the folded wings to the 3rd butterfly which push them up and make them 3D.....hope that makes some sense as it is hard to put it into words without any pics!!!  Here are some more pictures.


Monday 7 February 2011

I love to boogie


This LO is done using the jillibean soup fagioli  range of papers.  I made some of the rosette flowers by cutting 6 inch strips of paper and then folding it into a fan, sticking on a piece of card at the back and then some buttons.  I used my double sided tape rolls to make some glitter glue circles using the marigold distress stickles.  There is a fair bit of distress ink hidden away on the page, I inked my doily using marmalade, olive crush and firebrick - just dabbing them on with a makeup sponge.  I also did some paper rolling and a bit of a belt effect at the bottom of the papers and added some net to soften the brown paper, there is some hidden journalling too tucked behind the photos.  This is a picture of my DS performing to 'I like to boogie' by T-rex at a local summer festival with his dance class....complete with elvis costume and an inflatable guitar, he was great :) 


Thursday 3 February 2011

Splash


Here is one of the underwater shots from our holiday - only a little waterproof compact camera but some it took some nice photos...and videos and all the kids loved having underwater photos taken of them :)  I've not managed to get lots of scrapping done this week, but have speant some time purusing the new CHA releases which look lovely, and seen lots of gorgeous LOs in my browsing time.  I used the Basic Grey Kioshi papers for this LO, and the MS lace punch.  I dry brushed some silver around the edges of the paper, and then did some circle prints with the paint bottle lids - seen lots of this on LOs and fancied giving it a go.  The other thing I have seen more and more is the swirly string - stapled to the paper - this was fun as my stapler is tiny so I had to adapt where I stapled and the angle so that I could actually staple :) I thought it went well and looked a bit bubbly like the photo.  Here are some close ups.


LinkWithin

Related Posts with Thumbnails