Saturday 28 January 2017

Winter Wonderland with BoBunny


This is one of my favourite paper ranges from BoBunny this year  - Winter Wishes (so far! there are some gorgeous peaks of the new lines on the BoBunny blog).  I went for a mixed media page and it was really nice as Jill from ATDML had sent some Tando snowflakes in the kit too - they come in a mix of sizes and I just embossed them in silver - only one layer so that you get that dabbled (frosty effect).  The page started with some gauze and texture paste over the top, I then added lots of blue mist....several different manufacturers shades of blue - I went through my collection and the added a little grey too!  I also had a play with some puddles of embossing powder....which took ages to melt from underneath because of all the texture paste!!

I used some older Stampers Anonymous stamps from Tim Holtz (the ruler and clock) as well as Kaisercraft texture stamp in the form of the triangles.  I punched out several different size circles from a mix of the BoBunny papers and inked the edges in black soot distress ink.  I also had a play with some of the texture dies from Tim Holtz (Christmas present!) and cut and added some pieces around my photo.


I used some of the beautiful vellum in the Winter Wishes collection to add my title - I just stappled it here, but also punched out some circles too to add some silver sparkle.


I tucked one of my Tando snowflakes behind the picture, and added lots of layers of fabric, paint and die cuts.


I mainly use the grey, brown and cream papers from the pack as well as some of the vellum for my circle.


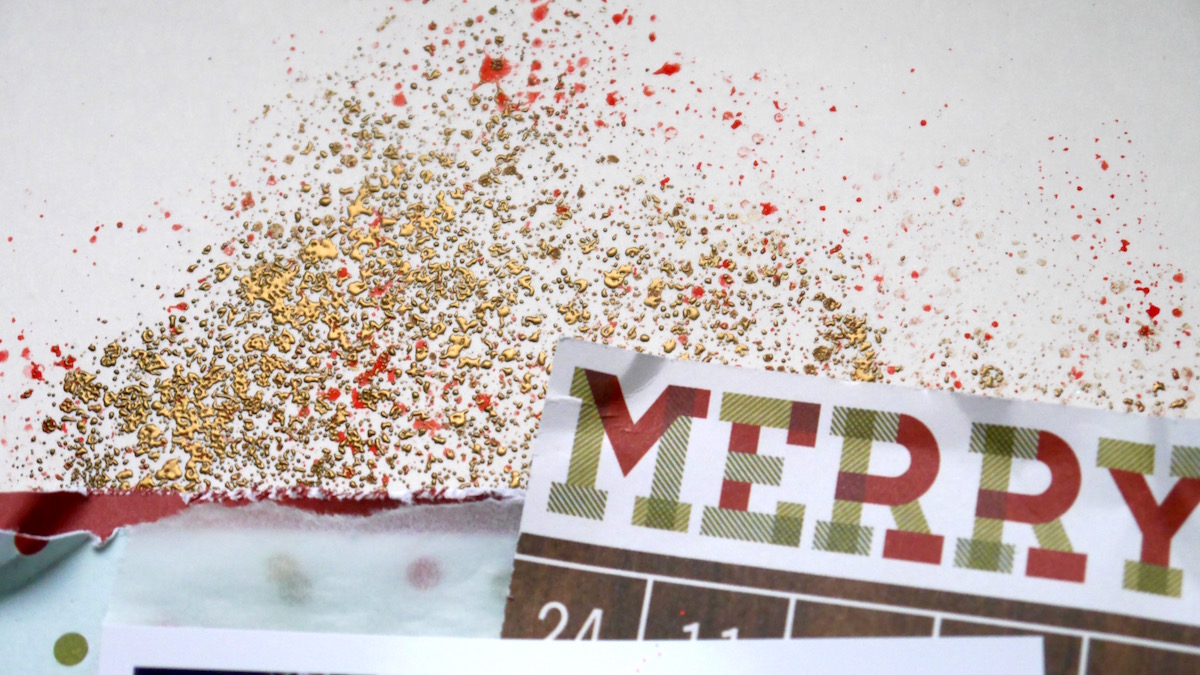
One of the puddles of embossing powder and some of the layers.

Wednesday 25 January 2017

Frozen Fun


Here is another page using Winter Wonderland from Simple Stories - in my kit from A Trip Down Memory Lane.  I started with the beautiful snowflake scatter woodgrain paper in the kit, and then with some of the left over pieces of paper I set about creating a ribbon of rolls (it takes less time than you think) - I used a thin pencil and cut some 1" by 2" strips of the paper, and taped them on the inside and just rolled.  The harder part was wrapping the twine around - which was just fiddly!

I layered up some of the postcard pieces from the journal papers and then added lots of stickers as well as some of the co-ordinating enamel dots.

I am still hoping for a bit of decent snow this year - just a couple of days, I love how it makes the world look, and the kids (and me) still love to play in it - this was our snow day (I think it was only 1 morning) last year and they were out early chucking it around and making the most of it!


Monday 23 January 2017

Awesome with Simple Stories


We were sent some of the new Simple Stories papers - this is Winter Wonderland to play with from A Trip Down Memory Lane.  Although the collection has 'snow' bits in it, it is also quite Autumnal too, so would work well with both seasons.    Also it is really clean for me - no paint!!!

I started creating a wiggley line on one side and then covered this in different layers of paper.  I created some mounts for my photos and added a journal spot and some of the stickers.  I did use foam pads for some of the flowers to add a little dimension.  The wood veneer title is from a pack at the Works, and then just a few glossy enamel dots (to make up for no paint flicks!).  

It was really fun to make, and I didn't have to wait for paint to dry which is nice, or it's a nice project to do whilst paint is drying.  The photo is from our trip to the States, I always love looking out the window at our planet - this is Greenland and you can see all that geography that you learn about in action - amazing glaciers, and glaciated valleys with pyramidal peaks and moraine - it is so beautiful. I do have a few photos like this as it always amazes me, but this is the first one I have scrapped!


Saturday 21 January 2017

Wonderful with BoBunny Winter Wishes and Pentart


I wanted to show you a page I made for Social Media for BoBunny using their beautiful Winter Wishes collection, I love the cool blues in this collection and it was perfect for my wintry beach photos.  

I started my page with lots of tearing and layered in some of BoBunny's copper foil accents as I was also going to play with the rust and iron paste from Pentart.  I created an area of Iron Paste (Pentart) behind my photo and had a play with the different regents on this, but also mixed in some BoBunny copper flitter paste too.  I tucked in some BoBunny chipboard and also some Pentart 3D balls - which add another layer of texture - I coloured these with bronze glimmer mist and copper glitter.  I also used them in the top corner of my page, again using the mind and paste around them.


I had a play with lots of paint colour flicking and mixed my own bronze colour paint from the pentart acrylics and added flicks of silver and white too.


Here you can see the 3D balls and the copper glitter paste as well as some silver thread that I used behind some of my layers.

One of the BoBunny chipboard pieces with all the 3D balls around it - you can use gel medium or even glue to stick these on - I used a gel medium as I was also using some of my mist and didn't want it to soak into the page, rather sit on the top.


I used one of the foils for the title and you can see some more painty layers.


I also decorated the brad in iron paste too.

Wednesday 18 January 2017

Philadelphia


So I think I mentioned about my Dad being the silliest in photos - I wanted to get some street shots of Philadelphia and thought it would be nice with people I know in them....so my Dad starts to pose, and my eldest just walks off in despair!!!

I used the Kasiercraft Scrapyard papers for this page, starting off with some stamping using my new Splatter stamp and also one of the background weave stamps from Kaisercraft.  I then tore and layered up my papers, using lots of the stickers from this range, I love the chevrons.  I also used some Pentart 3D balls to add a little texture to the page (and just play with them), I coloured them with green and orange distress inks first and then used gel medium to stick them to the page, I also added a little bit of bead paste - it's a subtle sparkle...not glittery but it has a nice effect.


Here you can see the splatter stamp at work in white, and beige.


In the top corner of the photo is some of the bead paste and then there are lots of layered stickers, stuck on foam dots.


Here you can see the letters that I cut from the Garage paper in this range to make the words.


You can see the different coloured 3D balls - piled near the stickers.

Monday 16 January 2017

The Liberty Bell with rust!


For this page I used some of the Prima Craftsman papers as the base and cut out several of the cogs as well as adding some of my own.  I used a Tando mask and some Iron Paste from Pentart, then I added some rust effect powders and let it dry.  I decided to add the Iron Paste and powder to the Tando cogs too, once that was dry I used the Rust Regeants and Rust effect from Pentart to rust all the paste and powder, and this built up the rust - it develops as you go - you probably need to leave it a good half an hour but you can see the magic start to happen before that.

I used a mixture of papers from Prima and some form the Kaisercraft Scrapyard range too, I also added some white flecks with my splatter stamp.


Here you can see how the rust has grown from the areas I placed the rust effect powder - you get proper orange looking rust.


You can see the powder on the cogs and a bit of the paste - I also used a little bit of the metallic waxes on the edges which give a beautiful metal like look.

Saturday 14 January 2017

You and Me with Scrapyard


I started this page with my splatter stamp and some white and green inks, then I embossed some BoBunny cogs using their stamps as well as adding some in black.  I used a bit of green and silver pentart acrylic through a studio calico hexagon stencil too.  I then distressed and layered up my papers, adding some twine around them all and the photo, then onto adding lots of the stickers.

I had a play with some of the Pentart rust effect powder on the Tando cogs, I added the powder using some clear drying glue and then dropped the rust effect regeants ontop - they are in 3 different colours so you do have a bit of control over the colours.  I also added some chameleon wax in green over the top.


Here you can see the cogs and the rust as well as the shimmer from the chameleon wax.


All the layers of cogs from the BoBunny stamps.


There is a great array of stickers in the scrapyard collection so it's nice to layer them up on foam dots.


Here ou can see the orangey rust as well as some of the bead paste from Pentart just to add even more texture to the cogs.

Wednesday 11 January 2017

Always Laugh with Kaisercraft Scrapyard


I am so behind with showing you pages I've made, but these are some of my recent favourites - we got to choose our own kit at the A Trip Down Memory Lane retreat in October and I went with the Scrapyard collection by Kaisercraft.  It is such a boyish range and gorgeous oranges and teals - I loved it.  It was also helped by a box of Pentart (from BoBunny) mixed media supplies to have a bit of a play with which really helped.

I started with tearing, and then used a BoBunny stencil - Serenity - the lines and circles as a background with some texture paste.  I added gesso and the antique copper mist from Cosmic Shimmer, then layered up all my papers and stickers and twine.  The chevrons are all stickers and you get loads of them, so I used foam dots, the alphabet I cut out from one of the sheets of paper and then again offset and added them on foam dots.

This is one of our holiday photos from the Intrepid and my son and father found it very amusing to pretend that the helicopter was moving - in fact my Dad is to blame for a lot of the sillier photos from this trip!


Loads of beautiful boyish stickers and antique copper mist stands out beautifully.


Here are the letters that I cut from the Garage paper - you can cut out the whole word, but I liked to cut the letters individually so you can arrange them how you like.


Lots of tearing and layering and you can see how the mist pops off the page.


Monday 9 January 2017

Christmas Glasses


This is one of those photos of what is a small present that suddenly becomes a big part of your Christmas....and it is unpredictable - who would have thought that a straw pair of glasses would bring so much fun!!

I recently picked up a mixed media large stamp that looks like loads of splatters - I love the white splatters of paint that you get on lots of the mixed media layouts now, and I have done it manually and am getting better at it (or closer to the effect that I want to achieve), but having the control of the stamp on some occasions is really good (especially if you are at a crop and have a friend working next to you!!!).  The background is a mix of red, brown and then gold embossed splatter stamps! I then used some of the Classic Christmas papers from Simple Stories around the photo and one of their chipboard frames (still love those).  I also had a play with embossing powder on some Tando baubles - I did half in a glittery red and then half in gold embossing powder and hung them from my photo, adding a few Simple Stories stickers as well


This shows some of the splatters the stamp is called Splatter and is by Impression Obsession - it is a large stamp so I used the rolling technique to just stamp where I wanted the splatters rather than have it mounted on a stamp block.


I added a little interest to the distressed edges with some punching poking out behind the layers.


One of my favourite little frames with one of the Classic Christmas square stickers in the centre.


Here are the Tando baubles - I did add both lots of embossing powder one after the other - I think it would possible work better to emboss half, then add the second powder and emboss again, but I need to have a play with that.

Saturday 7 January 2017

Christmas Cousins


In our December kits from A Trip Down Memory Lane we received some of the Christmas Delivery papers by Carta Bella - can I just comment on how thick these papers are, they are beautiful quality.  I loved all the tartans in this line, and teamed it will a little bit of an older October Afternoon Christmas line - I do believe that some of the October Afternoon designers are over at Carta Bella now which is nice to see.

I cut my mine patterned papers on different angles and then added the photos in the centre, I used quite a few of the stickers in this line (I love the little vans and the presents) and put some on foam pads, adding some just straight to the page.  The last step was the tag that came from Simple Stories Class Christmas and was one of their 3 by 4 cards - I trimmed it to be tag shaped and added it at the top of the page with some twine.

Here you can see the little tartan van and all the stickers layered up.


Again more tartan and stickers on different levels.


Here is the tag that I used with a beautiful saying on it from Simple Stories Classic Christmas.

Wednesday 4 January 2017

A little bit of Christmas


Hello everyone, I've realised I've been neglecting my blog for posting on other blogs!!  So I need to go a bit of a catch-up.  I've been doing my December Daily and will create a little slide show of that for you all - I am just waiting for some more selphy paper so I can print off my last few photos and complete the album.  So whilst we wait here is a class that I did in December for A Trip Down Memory Lane using Kaisercraft's Silver Bells.  For this page I used all the beautiful aquas in the collection and had a go at matching my yardstick with some white gesso sponging around the edges.  The photo is of my son with the tangerine or maybe chocolate orange that are always delivered in our stockings.


Next is very pink, and I know boys and pink....but I went with black and white photos and just went with it, and didn't make it too floral!  I do love the snowflakes on these papers so I punched out some matching ones and then also added silver glitter to their centres.  Jill had put in some silver mesh which adds another beautiful layer and is great for mixed media work.


For the last page I went with a grid - I am someone that can struggle to stick things on straight and it annoys me when I can tell that it isn't straight....so this paper was perfect.  I cut out lots of cards from their 3 by 4 card paper, and used a mix of Christmas photos to give a bit of a Christmas summary.  I had a play with more snowflakes and the mesh too.


Wishing all my readers a Happy New Year and I hope you all had fantastic Christmas'  I will be back with some more soon.

LinkWithin

Related Posts with Thumbnails