The idea for this tutorial came to me whilst making the roof to a lighthouse for our junk model island at school!
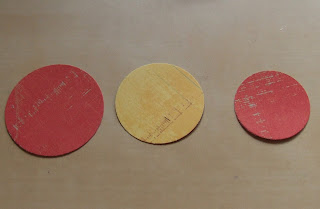
The supplies - 3 circle dies (these are sizzix ones) or punches or cut your own circles! PVA glue (or your glue of preference), scissors, ink for edging the circles, some 3D foam pads and a cocktail stick- sorry not in this picture.
Cut out your 3 circles - mine are in K and Co Wild Saffron paper
Ink the edges of the circles and then cut a slit into the middle
Ink the edges of each of the circles and then use the cocktail stick to role the edges of the paper under
This is what the circle should look like with the edges curled downNext where the slit is overlap the two sides by about 1cm - use the PVA to stick it together.
Do this to all three circles
Then push the centres down - this is so that the flower will layer better together and also it is slightly flatter for your page or card :)
All 3 layers appropriately squashed then use 3D foam to stick them all together
Place a button in the middle and this is the end result
I hope you enjoyed that - if you have a go at making any then please leave me a link as I would love to see them in action.


Oooh TFS - I'll have a go at these.:o)
ReplyDeleteSue x
How creative and inventive! Love your hand made embellishments. Thanks for sharing :)
ReplyDeleteThese look fab, I'll try one on my next LO that I'm going to put together tonight when the household has settled in front of the tv!
ReplyDeleteThanks for sharing X
oooh these are lovely, will be sure to leave you a link when i try them out :)
ReplyDeleteHow lovely, thank you very much - I can't wait to give these a go :)
ReplyDeleteso cute!!I will try these!! TY, Sutty!!!
ReplyDeleteLovely flowers - TFS - something to have a go at when I'm having a play.
ReplyDeleteToni :o)
Great tutorial and flowers. They're quite interesting and love where you got the inspiration from!!
ReplyDeleteCute! Love me some handmade flowers. :)
ReplyDeleteThanks for a great tutorial, I made one for my Scrap Map page here
ReplyDeletehttp://craftinginthecountry.blogspot.com/2011/03/scrap-map-girly-page.html
Thanks for sharing... will have a go, great tutorial...
ReplyDeleteHugs
Kim
x
Really love the flowers-will be having a go for sure!
ReplyDeleteOoh that's lovely had to come and see I love tutorials - thank you for sharing!
ReplyDeleteThis is really neat! I can't wait to use it on one of my layouts. Thank you for sharing.
ReplyDelete~Melanie
p.s. I became a follower of your blog, maybe you can follow me too. afternoonscrapper.blogspot.com
Gorgeous - am going to have a go at these :)
ReplyDeleteLou x
Fab idea - thank you for the inspiration - I'll be trying this for definite!
ReplyDelete