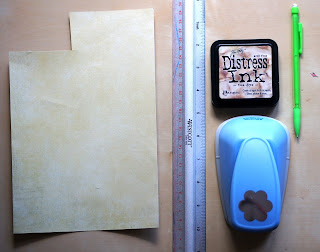
Amy asked how I did the stamp edge effect on You and Me, so this is what I used to do it. A circle punch would probably be easier than the flower, but the flower is all I had!! So above are the items you need.
The first thing I did was to measure the size of the semi circle I could make with the flower punch (this is a woodware 5cm punch)
The size of my semi-circle work out to be 1.7cm
The next step is to mark out the edge of the sheet of paper, I was allowing 1.7cm for my punch and then a 1cm gap inbetween - start from the corner with the 1cm gap, then mark along so it would be 1, 1.7, 1, 1.7 - and carry on til your cardstock edge is as big as you want it to be - remember to make sure you finish on a 1cm.
Then start lining the punch up with the dots and work your way along the cardstock. Don't worry if you accidentally catch a bit of the 1cm area with the punch as you can always trim it - that should make sense when you do this.
For the corners you need to always make sure you have the 1cm at the corner and not finish on a semi circle.
Ink the edges and here is your stamp shaped cardstock :)


Great tutorial, I think the flower punch is better actually because you know how deep to punch each semi-circle unless you put marks on the underside of a circle punch.
ReplyDeleteJenny x
This is so clever ... and what great results. Thank you for sharing.
ReplyDeleteThis is such a clever idea, will have to try it, looks great on the layout as well.
ReplyDeleteThank you, that is great, will add to the list on my blog :)
ReplyDeleteThanks for the tut Kat. You did good with the flower punch. *Ü* ~Glen~
ReplyDeleteCool idea!
ReplyDeleteThanks so much for the tutorial!!! I agree with the above poster...I think the flower is probably easier than the circle as I doubt I could like up the circle correctly over and over again! Love your blog!!!
ReplyDeleteVery resourceful idea and a lovely outcome
ReplyDeleteWho would have guessed?!
ReplyDeleteSuch a neat idea.
great tutorial :)
ReplyDeleteWhat a great effect - TFS the technique.
ReplyDeleteToni :o)
Wow, so much work!! But all worth it in the end. Great tutorial!
ReplyDeleteWhat a great idea! Thanks for sharing! I appreciate your comments on my blog!
ReplyDelete